Thursday, January 20, 2011

Leftover Corner: Meatball Pizza

When life gives you lemons, make lemonade. When life gives you meatballs, well... I think you can see where I'm going with this. You'll want to refer back to a couple recipes to get you where you need to be:


Even if you got your sauce and meatballs from another source--a restaurant, your mother, etc.--it's so easy to turn these supplies into a pizza, there's really no reason not to.

Ingredients:
2-4 Leftover Meatballs
Leftover Tomato Sauce
1 Pizza Crust
1/2 Onion
Shredded Cheese

Steps/Analysis:
To start things off, you'll want to preheat your oven to 415 degrees and get out a baking sheet or pizza stone, if you're fortunate enough to own one.
Lay out your crust and ladle on enough sauce to reach the outer crust. Sprinkle a healthy layer of cheese on top. I think you'll find that your local supermarket carries "Pizza" or "Italian" blends of shredded cheese, which I highly recommend. It'll usually be some combination of mozzarella, provolone, and parmesan: perfect pizza building materials.

Next, cut your onion into thin slices and scatter them around on your pie. Do the same with your meatballs.

Finally, pop that bad boy into the oven for 15-20 minutes, or until the cheese is bubbly and a little brown around the edges. Remember, there's nothing raw here, so you're warming, not cooking.

Notes/Suggestions:
A simple recipe, perfect for the single man or anyone looking for a quick meal after a long day. Can't go wrong with additional parmesan or red pepper flakes.

Monday, January 10, 2011

Nicki's Cinnamon Buns from Heaven

Hello, 2011! Hello, B.A. Gourmaniacs! We've made it through an entire year together and I, for one, am looking forward to a delicious new year.

Just before returning to my family home for the holidays, a grad school friend of mine (not Nicki, lest you be misled by this post's title) entrusted me with her coveted cinnamon bun recipe. Over the course of the fall semester, rumors of these pastries had taken on legendary proportions. I had the opportunity to test this bad boy out this week and, let me tell you, these cinnamon buns are nothing short of a breakfast miracle. The recipe takes a little time from start to finish, but the investment in time pays dividends in a gooey, flaky, delightful currency.
"Nicki's Cinnamon Buns from Heaven" was originally published in The Oregonian, out of Portland several years ago--my friend's copy of the newspaper showed definite signs of love around the edges--and has garnered some acclaim and notoriety in the meantime. You can find a fairly faithful reprint of the recipe here: http://blog.tracyporter.com/eating-gathering/cinnamon-buns-from-heaven
Since I received this recipe second-hand (or would this be third- or fourth-hand at this point?) I wouldn't feel right representing it here as my own. I will, however, show off some pictures I took during the baking process.

Ready? Enjoy, but try not to drool on your keyboard too much!


Here we have two pans of rolled, filled, and proofed cinnamon buns. Don't you want to take a big ol' bite out of them already?


After a brief stint in the oven. Whoa baby! That's a lot of puffy, yeasty, sugary, kitchen-air-infusing goodness.


I'm pretty proud of myself for waiting to administer the glaze before tearing into these like a monkey on a Christmas ham. That self-restraint wouldn't last much longer.

Plated up and ready for my stomach!

Monday, December 6, 2010

S'more Pancakes

Pancakes are a favorite canvass of mine. They're such promising frames of fluffy emptiness, waiting to be populated with fruit or chocolate or any number of amazing things. Once you get down the basics of batter consistency and flipping, there's no end to the creative breakfasts (lunches, dinners, or desserts, for that matter) that you can create.

With a bounty of mini-marshmallows on hand from my Thanksgiving yams, I set out to bring a little bit of the campfire to the griddle one morning.

Ingredients:
Pancake Mix
Water
Chocolate Chips
Mini-Marshmallows
Graham Crackers
Butter

Steps/Analysis:
All pancake batters are a little different. Some call for additional eggs, some for oil. The variety that I've been buying lately merely asks for the addition of water and it really doesn't get any easier than that.

Follow the directions on whatever box you purchased, but don't be afraid to adjust the ratio if need be. The batter should be thick enough to hold together, but still pourable. Also, keep in mind that it will tighten up a little bit as it sits on the counter. I've gotten to the point where I can eyeball a consistent batter and, with enough pancakes under your belt, you will be there too. I promise.

To your batter, add equal portions of chocolate chips, marshmallows, and crushed graham crackers. Err on the side of caution, though. Too many mix-ins is going to complicate things later on.

Another note: leave your graham crackers a little on the over-large side. They're going to soften up in the batter and throughout the cooking process, and you want an identifiable graham cracker texture.


Heat a pan or griddle over Medium-High heat and lube it up with butter. When the butter starts sizzling, you're ready to go.

Dose out the batter in whatever amount you're comfortable with, making sure to leave room for flipping.

Don't mess around with your pancakes after you've poured the batter onto the pan. I cannot emphasize this enough. The melty marshmallows and chunky crackers are going to create some strange shapes as the batter spreads out. You can neaten up the edges if you must, but remember that you only get one flip! No more, no less.

You'll know that it's time to flip your pancakes when the edges start to solidify a bit and air bubbles start to work up through their centers.

Wait a minute or so to brown the other side and cook the pancakes through, then quickly evacuate them to a large plate or serving dish.

Repeat until there's no more batter left.


Serving/Analysis:
It seems almost criminal to suggest that you pour syrup over these pancakes, so, officially, I won't. (That is what I did, though.)

After cooking up a batch, it occurs to me that you might want to increase the ratio of marshmallows and graham crackers to chocolate. They have much subtler flavors and have the tendency to fade into the background when you really want them to put their stamp on the dish.

Feel free to garnish the plates with additional graham crackers, chocolate chips, and marshmallows.

Monday, November 29, 2010

Thanksgiving Adventures: Yams

There are a number of benefits in having a steady female presence in one's life. Among the numerous reasons I'm thankful for the lady in my life is her cooking. Catfish? Whoo boy! Her macaroni & cheese? Ruined me for anyone else's or any brand, for that matter.

So, when she told me that Thanksgiving wouldn't be complete without yams, I said sure thing, Babe, let's hit the grocery store and get down to business.

Ingredients:
1 29 Ounce Can of Yams
1/4 Cup of Brown Sugar
1/2 Teaspoon Salt
1 1/2 Teaspoon Pumpkin Pie Spice
1 Tablespoon Melted Butter
1/4 Cup of Evaporated Milk
Mini Marshmallows


Steps/Analysis:
Preheat the oven to 350 degrees. Pour the yams into an oven safe baking pan or casserole and get mashing. If you don't have a potato masher on hand, a fork works just as well.

Add the remaining wet and dry ingredients, except for the marshmallows, and stir to combine. You'll notice the pumpkin pie spice coming into play again. There's no sense in letting it go to waste, but if you didn't just finish baking a pie, cinnamon and nutmeg are essential.

Next, toss in a handful or two of marshmallows and give them a quick stir as well.

Finally, use the rest of your marshmallows to create a thin top layer. It's okay to see some yams poking through this level of soft, pillowy sweetness, so don't pack them too tight.

That's really all there is to it. Pop those yams into the oven for about 20 minutes or until the marshmallows on top are melty and starting to brown.


Serving/Notes:
Spoon these bad boys onto a plate with some turkey and enjoy.

In all likelihood, you'll have a ton of marshmallows left over because they're generally packaged in pretty big bags. My suggestion? Make some hot chocolate for yourself.

Sunday, November 28, 2010

Thanksgiving Adventures: Pumpkin Pie

Let's talk Turkey Day. Since I'm currently living about 6 1/2 hours away from family and am at the whim of my graduate school's academic calendar, it was up to me to make Thanksgiving happen this year.


It wasn't all bad, though. My lady and I hunkered down in the kitchen and kept up a steady intake of beer and wine to aid in the cooking process. In fact, everything turned out really well and a real-deal, grown-up Thanksgiving was had.


Don't believe me? Check out the photographic evidence below.


Yum. Makes me hungry all over again just looking at it.

Clearly, this spread is just too much to catalog in a single blog post, so I'm going to parcel it out over the next week or two. Start taking notes for next year, folks. I'm starting this series of posts off with dessert, because I'm an adult and can have dessert first if I want to, damn it!

Here is my pumpkin pie.

Ingredients:
1 Frozen Pie Crust (Deep)
1 15 Ounce Can of Pumpkin
1 12 Ounce Can of Evaporated Milk
3/4 Cup of Sugar
1/2 Teaspoon of Salt
3/4 Teaspoon of Pumpkin Pie Spice
2 Eggs


Steps/Analysis: Start off by preheating your oven to 425 degrees.

Next, in a small bowl, mix the sugar, salt, and pumpkin pie spice. Pumpkin pie spice, for those of you who don't know (which included me until just a couple days before Thanksgiving), is a combination of cinnamon, nutmeg, ginger, and cloves. It smells like the holiday season in a canister--it's a beautiful thing.


In the largest bowl you own, crack and beat the two eggs. Slowly stir in the canned pumpkin and the mixed dry ingredients.


Work in the evaporated milk in small installments, thoroughly incorporating each one before adding in the next. Take your time with it because this is your pie filling, for better or worse.

Pour the filling into the pie crust. Hopefully, you trusted me and bought the deep variety. Otherwise, you'll have half a bowl of pumpkin soup to deal with.

Carefully slide the pie into the oven and set your timer for 15 minutes. Once that goes off, you'll want to back down the oven temperature to 350 degrees and let it bake for another 40-50 minutes.

I say 40-50 minutes, but, really, the only way to know when the pumpkin pie is done is if you can insert a knife into its center and pull it out clean as a whistle. When you've attained that state, let the pie cool for at least 2 hours before serving.

Serving/Notes:
I actually baked this pie the day before Thanksgiving in preparation for the big day. I cooled the pie, as noted above, then covered it with aluminum foil and popped it in the refrigerator. I think this is probably the way to go to guarantee solid, un-runny pie contents.

When you are ready to serve, there's only one way to go: topped off with loads of whipped cream. Otherwise, enjoy the cool, creamy, pumpkin-y finish to your meal.

Sunday, November 14, 2010

Leftover Corner: Spaghetti and Meatballs to Italian Burrito

I don't quite know what got into me this week. I've had a lone tortilla in the refrigerator for a while now, quietly mocking me and my lack of beans, rice, or any other Mexican fare, so that might have something to do with it.

Maybe I felt like channeling my inner child and playing with my food. Maybe I've lost my marbles. You be the judge.

I humbly present, for your approval, the Italian Burrito.


Ingredients:
1 Large Tortilla
Leftover Tomato Sauce
2 Leftover Meat Balls
1 Small Handful of Spaghetti
Shredded Mozzarella Cheese

Steps/Analysis:
First, get a pot of water boiling over High heat. Salt the water and add the spaghetti. Try to remember that cooked pasta always looks like more than when it was stiff and dry. This is going to be crucial when you try to fit it into a tortilla.

As the spaghetti cooks, break out your leftovers! Cut up two meatballs into bite-size pieces and set them aside.

If you have a George Foreman grill, as I do, or a panini press, you'll want to warm it up now. If not, you'll have to experiment with a pan on the stove top as we go along.

Now that I think about it, the oven might work as well, on very low heat.

At any rate, once your pasta is done, drain it as thoroughly as possible and return it to the pot. It's residual heat is going to help dry the pasta as well, which is very important to the integrity of the tortilla.

Add a few spoonfuls of leftover sauce to the pasta and stir to coat.

Get your tortilla out and prepare it with a thin layer of mozzarella cheese. Next, situate the spaghetti in the tortilla's center. Arrange the meatballs on top and spoon on a little more tomato sauce. Sprinkle a little more cheese over everything.

Wrap the tortilla as well as you can. Unfortunately, I cooked a little too much spaghetti and could not tuck in my ends--as you'll see in my pictures. That means I had to be a little more careful in placing it on the Foreman.

Serving/Notes:
Because my wrapping was a little untidy, I attached this beast with a fork and knife at first. Surprisingly, though, as I ate, I found that it was possible to pick the Italian Burrito up and eat it as I had originally intended.


My goodness, the tortilla is a marvelous thing, isn't it?

As far as taste is concerned, this isn't all that different from eating spaghetti and meatballs in the more conventional way. It is, however, a lot more fun, I think. In that respect, this was a worthwhile little experiment.

Thursday, November 4, 2010

Turkey Meatballs

What's the point of having tomato sauce if you don't know how to make meatballs? Seriously. Pasta's nice, but you need a little protein to go with your carbs, don't you?

It's surprisingly easy to make a good meatball. You really only need three ingredients, so there's no reason not to make them. Well, besides the icky feeling of raw meat squishing between your fingers, but to that, I say, "grow up."

Alright? Alright. Let's make some meatballs.

Ingredients:
1 lb of Ground Turkey
2 Eggs
1/2 Cup of Bread Crumbs (Italian Seasoning flavored, preferably)
Olive Oil

Steps/Analysis:

First thing's first: you'll probably want to get a pot of tomato sauce on the stove. If it's my homemade recipe from last week, awesome. If it's store-bought, well, I'll just turn my head while your crack open the jar. Put the sauce on Low heat and let it start to simmer.

Next, you're going to need a really big bowl. Really big. Trust me.
When you've found your massive bowl, dump in the ground turkey. Follow that up with the eggs and bread crumbs.

Now, it's time to get your hands dirty. Get in touch with your inner, mud-pie-making child and mix everything up really well. The more consistent the mixture, the better.

At this point, you should get a pan on the stove and let it warm up over Medium heat. You'll also want a relatively large plate on which to deposit your meatballs.

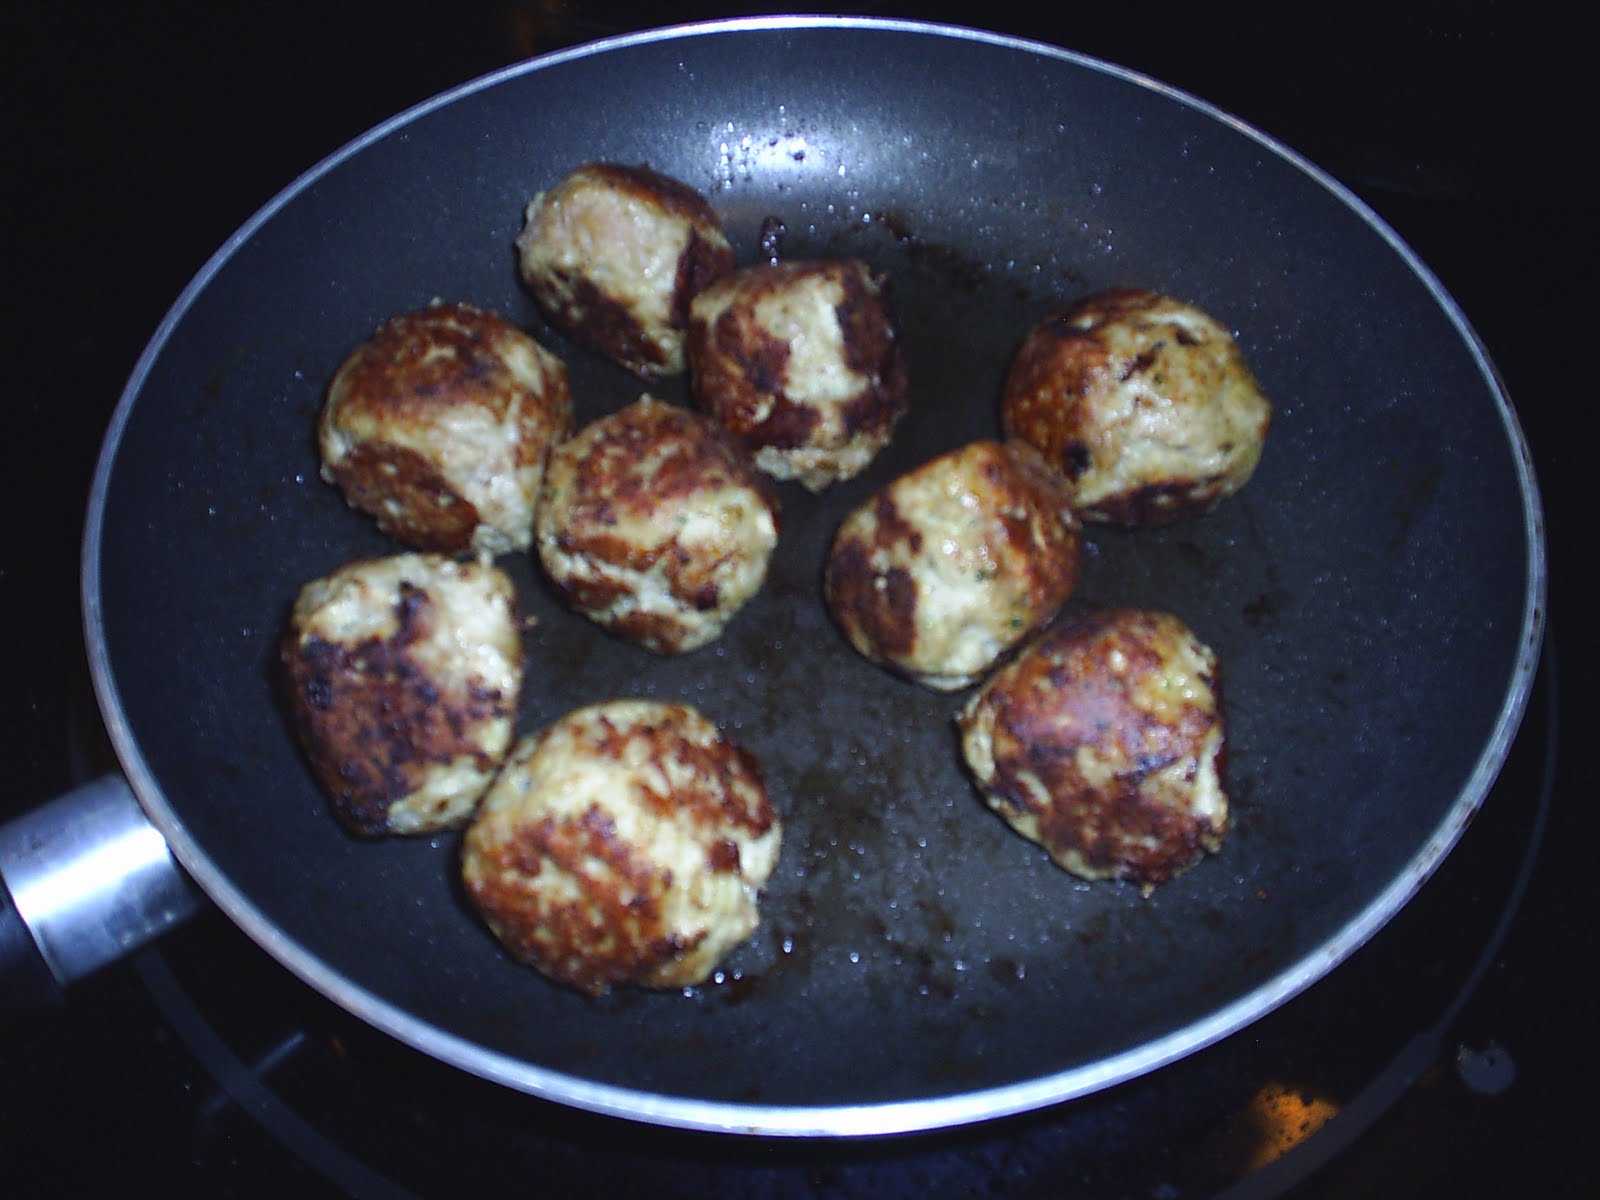
Gather up a small handful of meat and roll between your palms into a nice, little globe and set it aside on the plate. Repeat this process until you're out of meat. Depending on the size of your balls, you'll probably get 14-18 by the time you're done.

Add a little olive oil to the pan and carefully shift your meatballs from plate to pan. Don't overcrowd the pan. You may need to do this in more than one batch.
As the meatballs start to brown, roll them over with a spoon. Keep doing this until the entire surface is just a little crispy and the meatballs are cooked through the center, or at least most of the way there.

Move the meatballs into the simmering sauce and let the pot sit on the stove for about an hour or so. That'll give all the flavors a chance to meld and mellow and let the meatballs finish cooking, on the off chance that they're a little underdone.

Serving/Notes:
I was really pleased with this first attempt at meatballs. They were firm and flavorful and starting them off in the pan gives them a little crunch that they wouldn't have otherwise.

If you pair this recipe up with my updated tomato sauce, you'll have leftovers for weeks too, which is nice. Either that, or you can have a big pasta-and-meatball party!

Gourmet Counter